2 Point Perspective Drawing House
Perspective Drawing of a House
Adding the Rooftop
This art tip deals with drawing a house and adding a roof. If you are not familiar with perspective please review my post covering one and two point perspective.
All houses are boxes so you need to know how to create one and two point perspective boxes. We will start with the box and then add the roof. There are two examples one in one point and the second in two point perspective. Let go ahead and get started.
To try and draw this from home you will need the following items.
- large peice of paper 14″ x 17″ or 18″ x 24″ ish.
- A drawing board 24″ x 24″ is a good size.
- One 24″ or 30″ T-square
- one 9″ or 10″ triagle
- An hb or #2 pencil
Insight on Images
I also wanted to point out the first house is below the horizon line as if it was seen from a 2nd or 3rd story window. The second house is seen as if I was standing on the ground looking at the house. It's all about where the object is on relationship to the "Horizon Line"!
Extra Information Drawing a House in 2 Point Perspective
Step 1. Making the Box
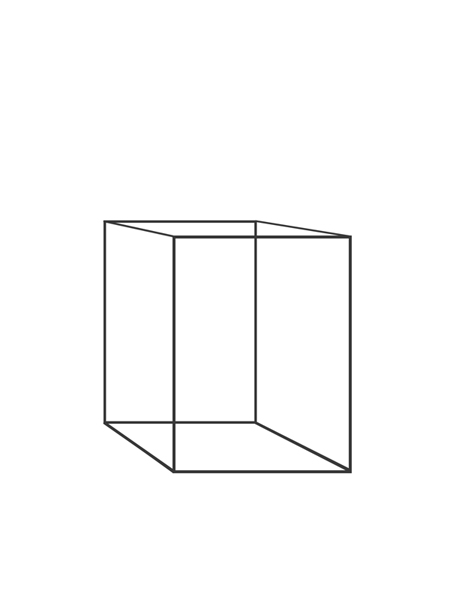
Create a box in One Point perspective. You can see the top of this box meaning the box is below the "horizon line". The horizon line will be shown in later steps. Using the "horizon line" and a "vanishing point" I created this box.
Step 2. Finding the Middle of the Box
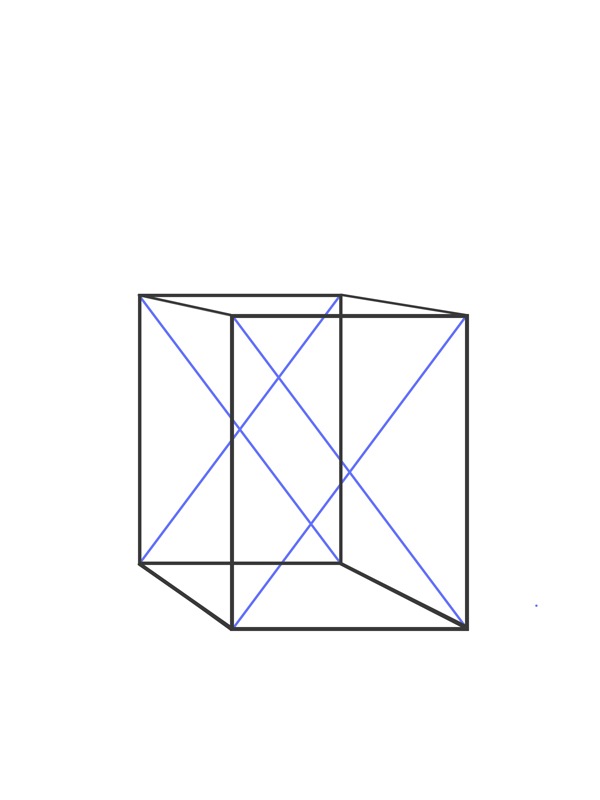
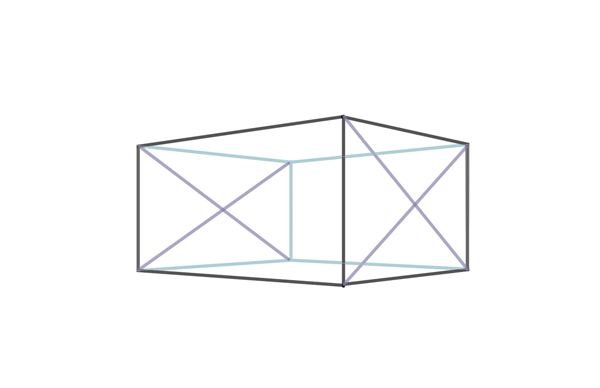
Find the middle of both the front and back side where the top of the roof will be by drawing diagonals from corner to corner to create an "X" on both the front and back sides.
Step 3. Vertical Lines through the Middle
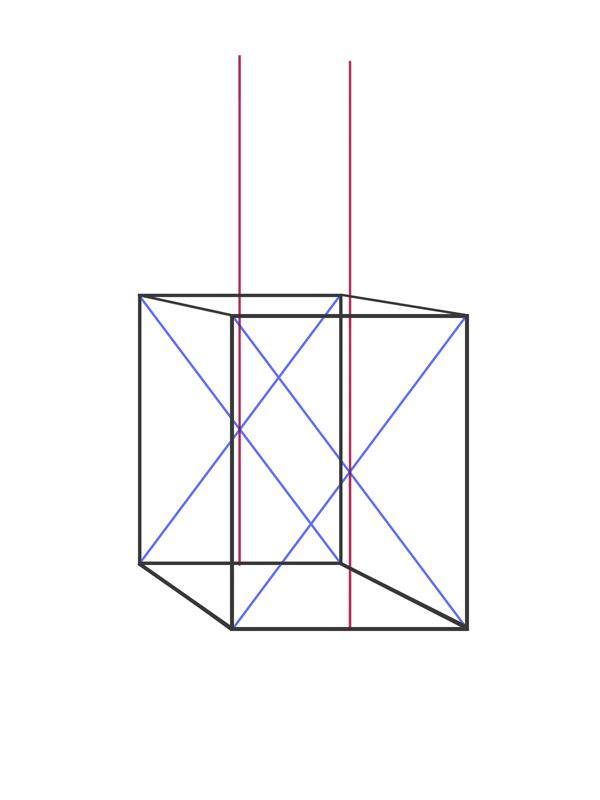
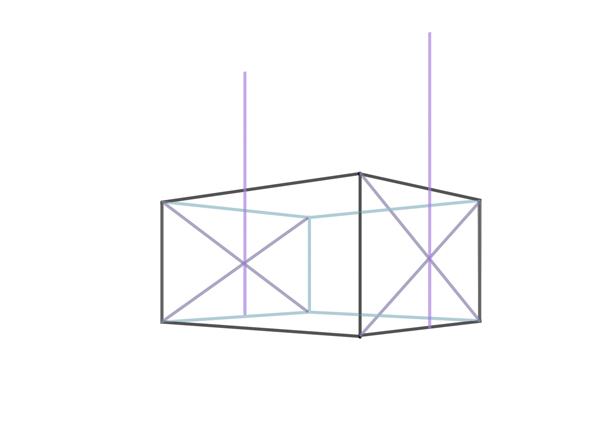
Draw Vertical Lines through the middle where the lines cross. We will use this to create the triagular part of the roof.
Step 4. Showing the Horizon Line and Vanishing points
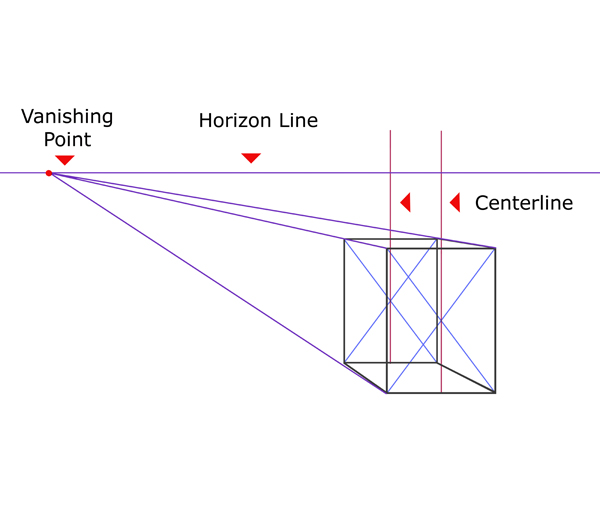
This shows both the vanishing point and horizon line used to create the original box along with the centerlines through the middle of the box.
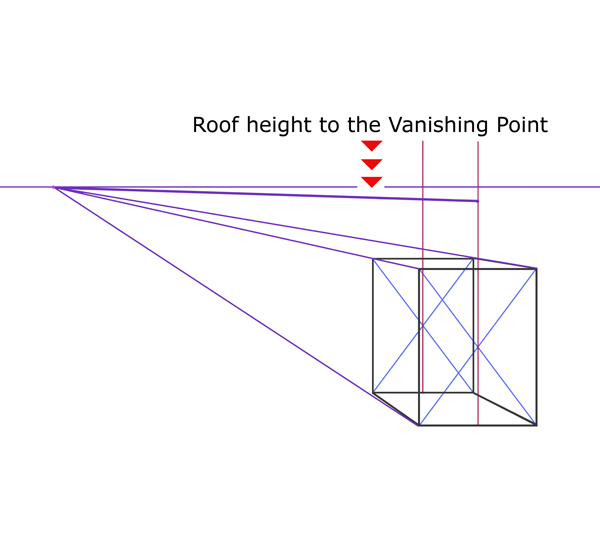
Step 5. Finding the Roof Height
We need to mark the height of the roof. I radomly choose the roof height, by marking a point on the front center line. Then I took that point on the "front centerline" and drew the point back to the vanishing point.
Step 6. Connecting the Points for the Roof of the House
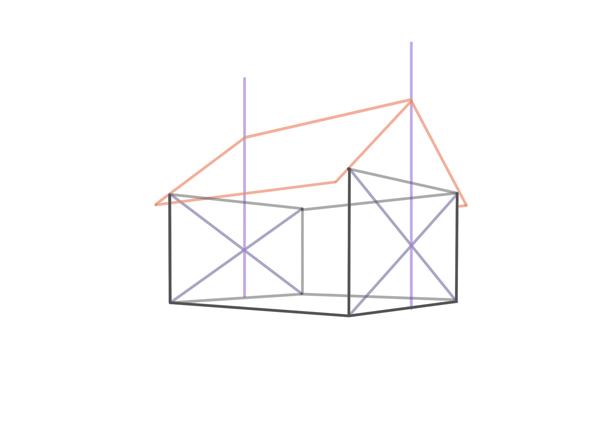
I connected the center point and the top front corner and then the top left corner of the box and I did the same thing on the back to create the roof. I drew an extra lenght for the roof to overhang the top of the box.
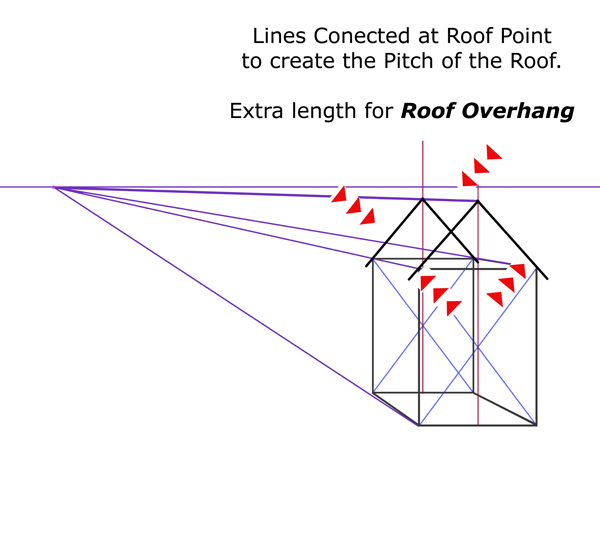
Step 7. Making the Overhang Equal
By deciding on the amount of overhang I took that point straigth across the front side and then back to the vanishing point to make it even all the way around. Shown below.

Step 8. Darkening the Seen Lines
This shows the overhang darkened where I will see it. I now need to clean everthing up.
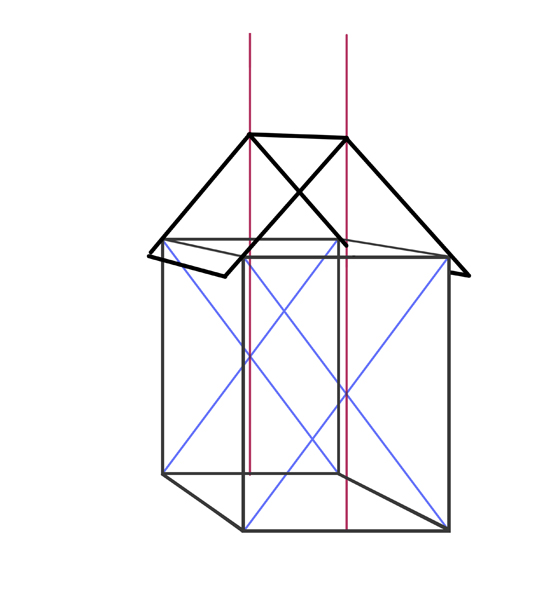
Step 9. All Cleaned Up!
It ma seem a bit strange strange without any windows or a door, but this is the house with a roof drawn in One Point perspective. It is just waiting to have some doors and windows added.

Two Point Perspective.
We will create a different house this one seen by someone standing on the ground.
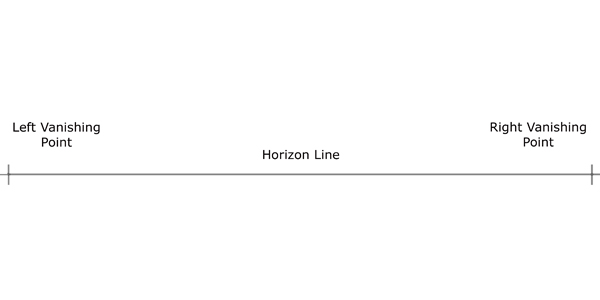
Step 1. Starting with the Basic Setup
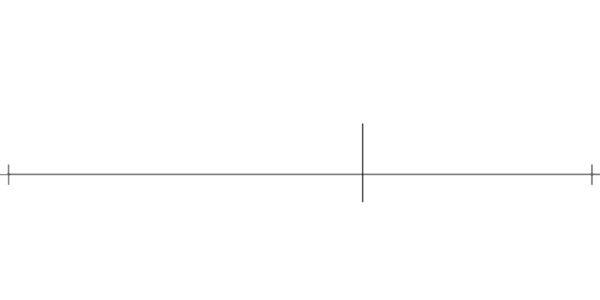
For two-point perspective we need a "horizon line" and a right and left "vanishing point."
Step 2. Making the Box
Using a vertical line that will be the "corner" of the box, this line straddles the horizon line. Meaning it starts below our eyes in this case my feet and above my head since most houses are taller than I am. Now for the next step!
Step 3. The Right and Left side of the Box
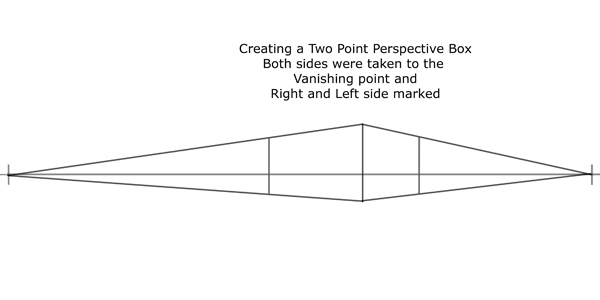
I decided at random the length of the right and left side of the box. We can already see the box emerging below.
Step 4. Finding the Back Corner
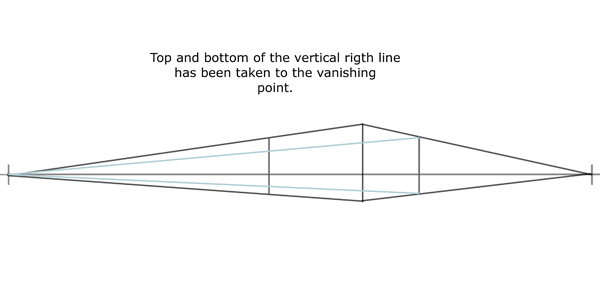
To find the back corner I need to take each side of the box to the vanishing point. For instance for the "right side line" of the box I need to take the top and bottom of that line and draw them to the "left vanishing point. I then need to take the top and bottom of the "left side line" and draw them to the "right vanishing point" as seen in the illustration below.
Step 5. Drawing in the Back Coner of the Box
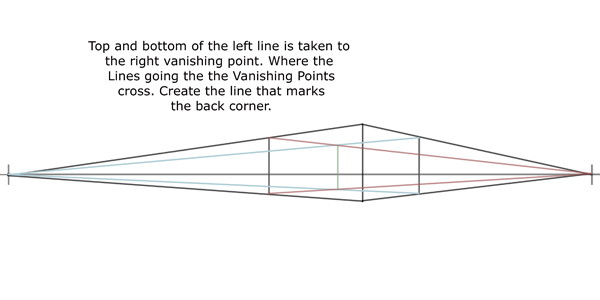
Where the two sets of line cross, marks the back corner of the box.
Step 6. The Box, Front Right Side and Back Side of the Box
with the Middle Marked.
Step 7. Middle Verticals Marked.
Step 8. Showing the Completed Roof
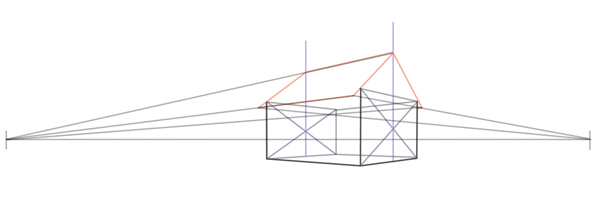
Step 9. Making the Overhang Equal
The Illustration below shows the overhang taken around the roof to make the overhang equal on all four sides.
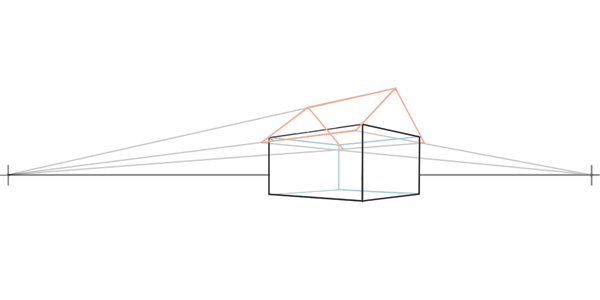
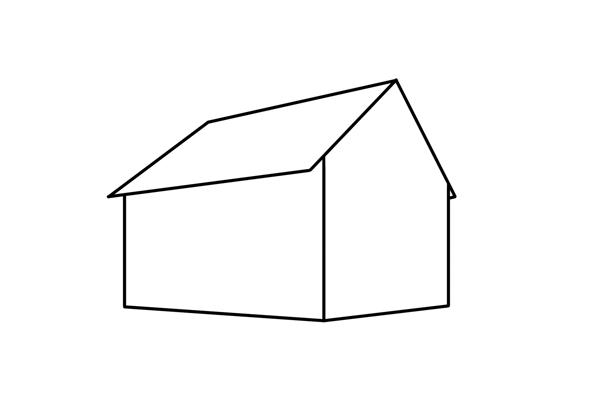
Step 10. Finished House
All cleaned up and ready for windows and doors.
I hope you enjoyed drawing a house with a roof on it! Contact me with any questions at artist@kevinmccainstudios.com
2 Point Perspective Drawing House
Source: https://kevinmccainstudios.com/how-to-draw-a-house-rooftop/
Posted by: robinsonmuld1978.blogspot.com

0 Response to "2 Point Perspective Drawing House"
Post a Comment